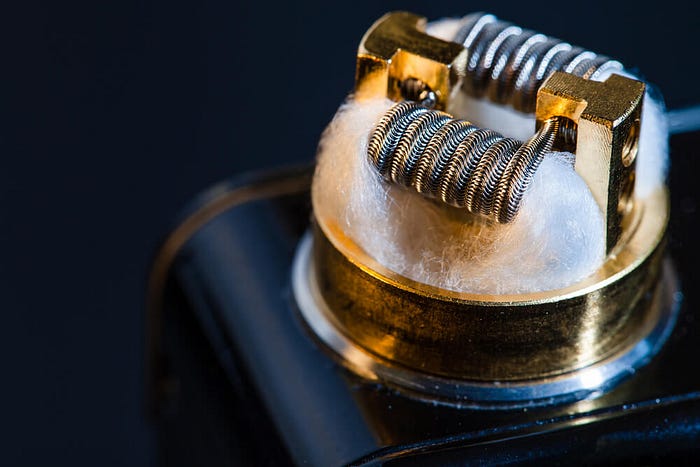
How To Wick Your DIY Vape Cotton
Whilst many people have turned to the likes of CBD capsules for their vaping needs, one of the quickest ways to feel the benefits is through vaping. With different concentrations and CBD flavours on the market, the choice is almost infinite and is opened up even more by the wide range of vape devices you can choose from. These span from the easy to use pod mods and disposable cigarettes to the more complex rebuildable vape devices. The latter is known for the broad customisation that experienced vapers can experiment with, giving them the freedom to explore the temperature, charge and the overall feel of their vape experience.

This blog will focus on an aspect of DIY vaping that is often overlooked — wicking your own cotton. With many rebuildable mods allowing for you to add your own atomiser, many people will make do with the cotton included in the build and will replace their atomiser when the cotton is worn down. It’s easy to forget that you can simply resupply your atomiser and coil with new cotton, saving money and giving you even more room to experiment with taste and temperature. Below are some easy steps to rewicking your vape mod.
Type Of Wicking Cotton
For the purposes of this how-to-do list, the focus will be on organic wicking cotton due to its abundance and popularity. That being said, most types of wicking cotton will be used in much the same way as classic cotton. Other options include silica, rayon fibre, ekowool or koh gen do instead. After all, it all comes down to personal preference.
Threading Your Coil
First off, you’ll want to stretch your cotton ball into a rope-like shape. Make sure that it is thin and fine, and that the density has been increased by rolling it between your fingers. Once it’s in shape, the fine rope should be able to be threaded through the spaces beneath and between your coil. Revise the shape and size if it is either too small or too thin, you want the cotton to fit snugly.
Trimming your Wick
After threading the wick (imagine that it’s a needle your threading), make sure that there is about half an inch of cotton either side of the coil. You’ll want this slight excess so that there is enough cotton to absorb the vape juice. If the cotton justs out wider than half an inch, trim it down to size.
Tuck Your Wick
Tuck the half-inch ends underneath your coil using a fine screwdriver or tweezers. This will make sure that you don’t nudge the coil out of place during the rewicking.
Let It Breathe
If possible, use the screwdriver, or indeed a needle to create a small air tunnel underneath the wicking cotton and coil. This will allow air to pass through the coil and cotton, allowing you to take deeper inhales at cooler, air filled temperatures.
Try And Test
Drip a few drops of e-liquid onto your cotton to absorb and avoid dry hits before placing the coil and atomiser into the rebuildable deck. Now it’s time to try and test. If something doesn’t taste right, take out the atomiser and coil and make sure that you’ve followed the above steps.
